Navigation
Plans4Trips Help
Tour Administrator Guide
Role Overview
As a Tour Administrator, you are responsible for creating and managing tours, inviting participants, and overseeing the overall planning process. This guide will help you understand your responsibilities and how to use the platform effectively.
Signup for Early Access
During the early access stage, if you want to create and manage tours, you must request access by filling out the signup form below. Here is how the process works:
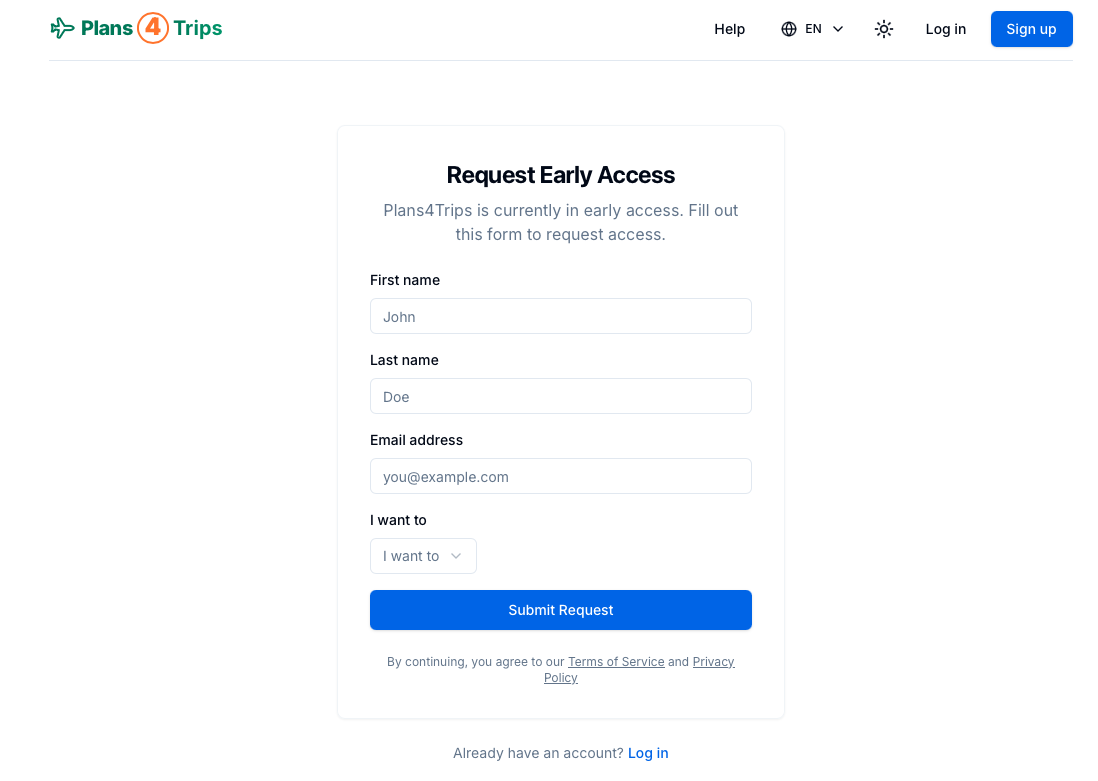 Screenshot: Early Access Signup Request Form
- Go to the signup page and fill out the early access request form.
- Provide your name, email, and select "I want to" → "Create and manage tours".
- Submit your request and wait for approval from our team.
- Once your request is approved, you will receive an email invitation to complete your registration and start creating tours.
After your request is approved, you will receive an email like this:
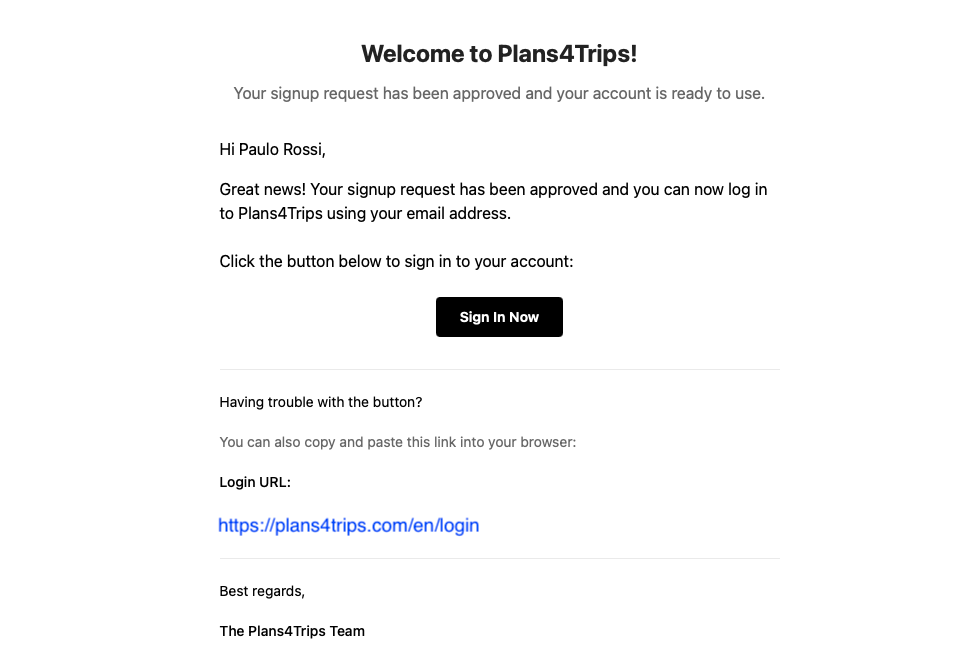 Screenshot: Approval Email
Step 2: Log In to Your Account
After your early access request is approved, log in to your account using your email address.
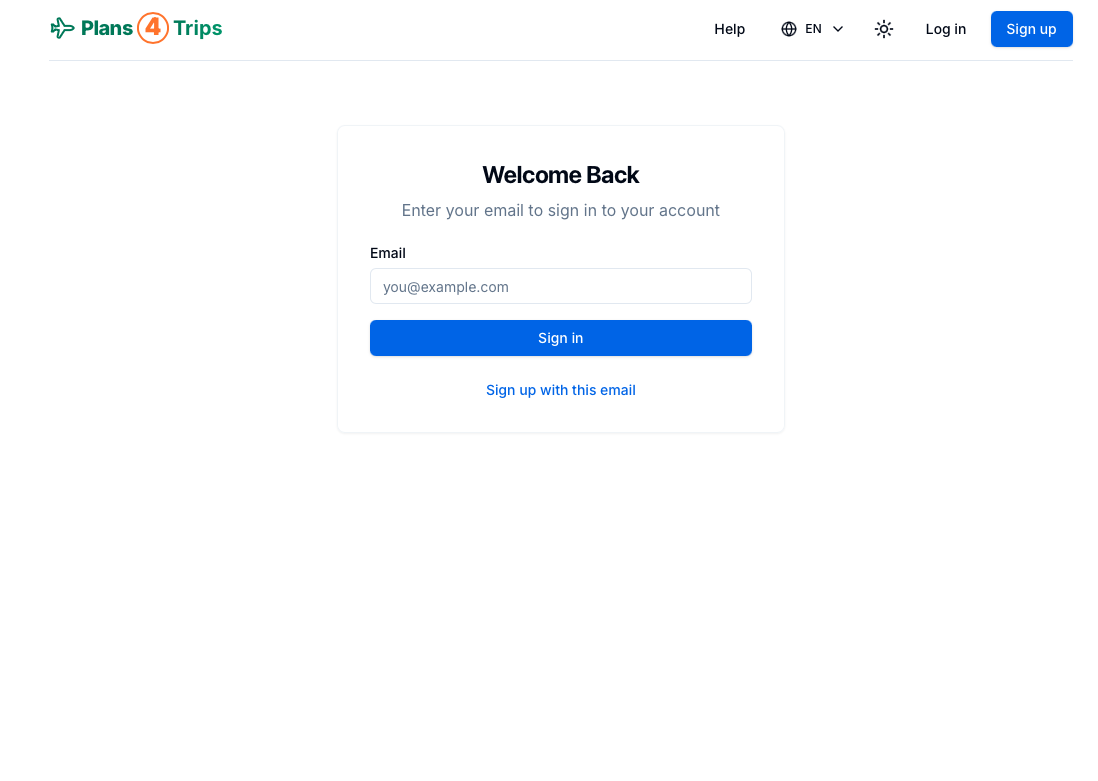
You will receive a “magic link” email—our site does not use passwords.
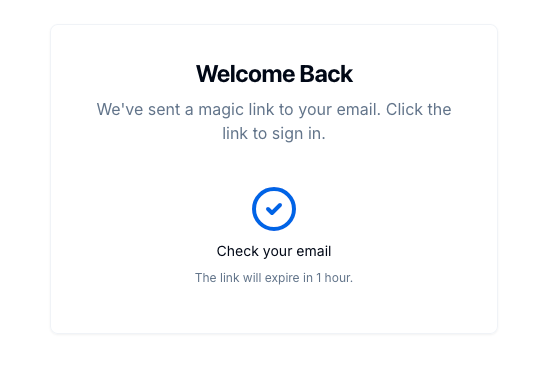
Click the “magic link” in your email to securely access your account.
Step 3: Create or Discover Tours
Once logged in, you are ready to create and manage tours. You have two options:
Creating a New Tour
Step 1: Basic Tour Information
- Click on "Create Tour" from your dashboard
- Enter the tour name (e.g., "Australia & New Zealand Adventure")
- Set the tour dates (start and end dates)
- Provide a brief description of the tour
- Add any relevant tags or categories
Step 2: Location Planning
- Define key destinations within your tour
- Set accommodation locations for each night
- Mark important landmarks or meeting points
Managing Tour Locations
The Locations editing page is a powerful tool that helps you plan where your tour group will be each day. You can specify wake-up and sleep locations, add accommodation details, and include helpful location links.
Daily Location Planning
- For each day of your tour, you can specify:
- Wake-up city and accommodation
- Sleep city and accommodation
- Location links (Google Maps, what3words, or custom URLs)
- Use the "Apply to Subsequent Days" feature to quickly copy location details to following days
- Add location links to help participants find meeting points and accommodations easily
Adding Location Links
- Click the link icon next to any city or accommodation field
- Choose the link type:
- Google Maps - for precise map locations
- what3words - for exact location references
- Custom - for any other location-related URLs
- Add an optional label to make the link more descriptive
- You can add multiple links for each location
Tips for Location Management
- Keep accommodation details clear and specific
- Include both the general area (city) and specific location (accommodation)
- Use the preview feature to see how the locations will appear to participants
- Save your changes regularly - the page includes autosave functionality
- Double-check all location links to ensure they work correctly
Pro Tips
- When copying locations to subsequent days, review each day to ensure the information is still accurate
- Include both official hotel names and common names in accommodation fields
- Add links to hotel websites or booking confirmations as custom links
- Consider adding emergency meeting points as custom location links
Managing Participants
Inviting Participants
- Navigate to the "Participants" tab in your tour
- Click "Invite Participants"
- Enter email addresses of people you want to invite
- Customize the invitation message (optional)
- Send invitations
Managing Access Levels
- Assign group leaders for specific activities
- Manage participant permissions
- Remove participants if necessary
Planning Activities
Creating Daily Itineraries
- Navigate to the specific day in your tour calendar
- Add activities with start and end times
- Include important details like meeting points and requirements
- Assign group leaders to specific activities
Managing Proposed Activities
- Review activities proposed by participants
- Approve or decline proposed activities
- Adjust timing and details as needed
- Communicate changes to participants
Tour Settings & Configuration
General Settings
- Update tour information
- Manage privacy settings
- Configure notification preferences
- Set activity proposal rules
Advanced Features
- Export tour details
- Generate reports
- Manage tour templates
- Set up recurring activities
Best Practices
- Keep the itinerary flexible to accommodate changes
- Regularly communicate updates to participants
- Set clear expectations for participation
- Maintain a balance between scheduled activities and free time
- Document important decisions and changes
Need More Help?
If you need additional assistance, check out our FAQ section or contact our support team.